A breakdown of... Microsoft Teams (Group work)
- Teacher Breakdown

- Apr 24, 2020
- 5 min read
"I just miss the kids and my classroom so much!" - Are you kidding? This is literally the best thing to happen to me...

Who knew that my previous posts on OneNote would become so relevant. Thanks to Mr Coronavirus (I am using a male pronoun, as the history of the world suggests all major disasters have been caused by men) the world of education has been given a sharp kick over to digital learning. In response to this, there is a huge number of teachers that have thrived; they have really embraced the endless possibilities that the digital world can bring. Meanwhile, others have been staring at their OHP acetate sheets wondering... 'How do I digitise this?'
Whatever your confidence level, I am hoping in the coming weeks to share some insights from my experiences of using Microsoft Teams and OneNote in my teaching. While a lot of Microsoft blogs and videos show you the 'techy' side of things (they are still great, so check them out!), I will focus more on the aspects of teaching that you would most want to continue with in this new digital future. Consider these posts your very own Google translate, to interpret the technological jargon and convert it into a more user-friendly language (because what on earth is a 'channel'???)
Can I use Teams for group work?
The simple answer is yes.
There are a couple of ways to continue using group work digitally; it is just a case of considering what you want each group to be able to do. Here, I will show you a number of resources that are built into Teams (and it's associated programmes) that make small-scale collaboration a doddle (I will cover whole-class collaboration in a future post!)
1) Separate channels
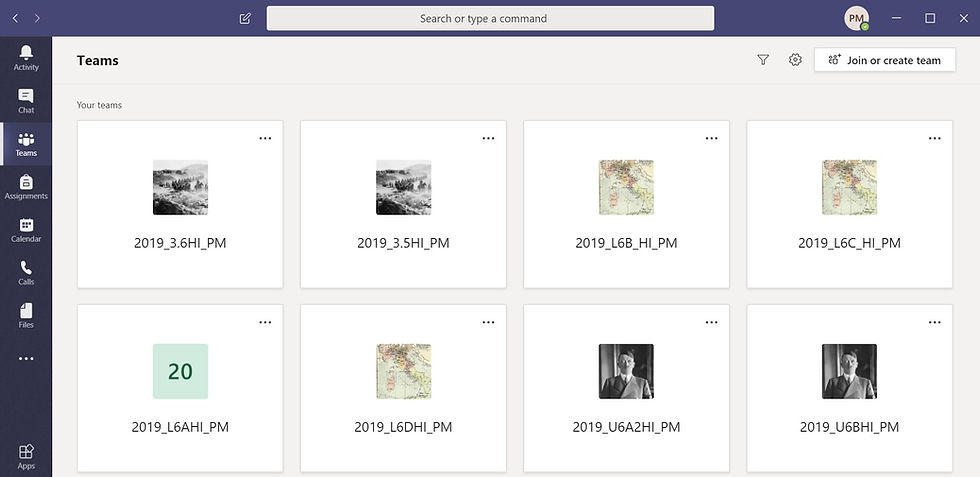
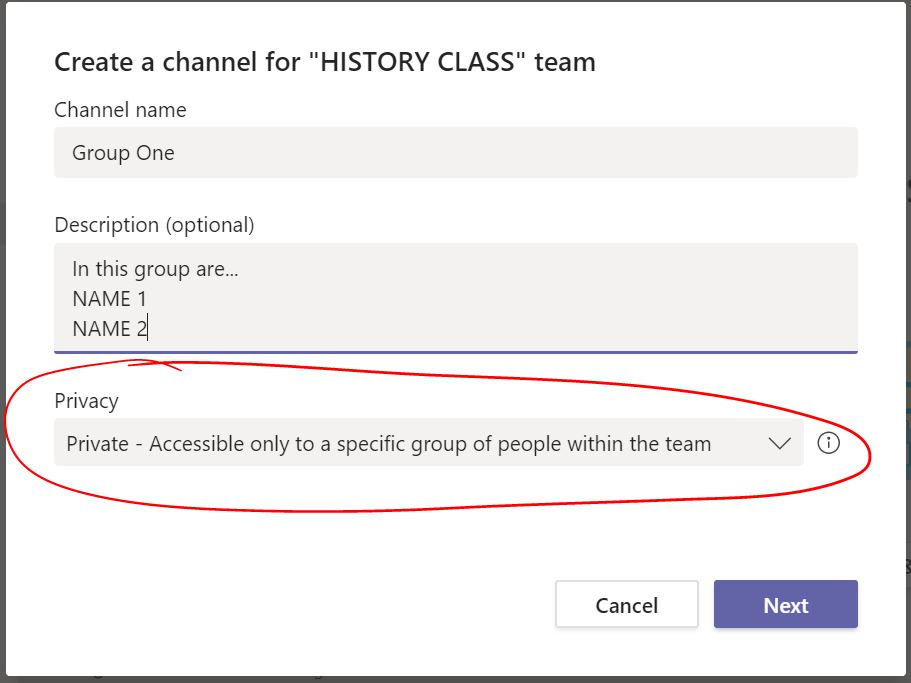
This is one that I love to use for more substantial pieces of group work - perhaps those 'project' tasks that last a couple of lessons, or the tasks that require a lot of interaction between pupils. Here, you are almost creating a separate team within Teams, so certain groups can communicate with each other in private. This obviously means that they can send files, post ideas and even do a video meeting as part of their preparation. As the owner of the Team, you will automatically be able to monitor all channels, so there is no danger of things going on behind closed digital doors! To set things up, head to the '...' at the side of your class Team and select 'Add channel' (see below). Then, give your new channel a name (e.g. 'Group One') and a description. The description is optional, but I have learned to put the names of the students that are in the group in here, otherwise you get the standard posts of: 'OI OI!!! Who is in this group????', which nobody wants... You will then need to change the privacy settings so that only a specific group of people within the team can view the channel; after pressing 'Next', you will type the names of the students you want to add into the group. And that is it, all done! I used this a few weeks ago with my Year 9 class. I split the class into two ('For' and 'Against') and they spent the lesson working on their side of a debate. We then did a digital debate over audio call. Students will often need a bit of encouragement to get going, so write a couple of posts in each group to explain the task; you may even have to assign pupils specific roles so that they understand what they need to do.


2) OneNote Collaboration Space
If you are up and running with Teams, then I am assuming that you are also working with the Class Notebook feature at the top of the page. If not, then I would REALLY recommend taking a look at the 'How To' pages from Microsoft, as the Class Notebook is such a valuable tool that will make your distance-learning life a lot easier. Imagine having a pile of exercise books that do not cause a shoulder dislocation to carry and can be marked at the click of a button... Yeah. Amazing. I have written a previous post on how to create/set/mark work on OneNote and I have also shared some of my top tips - so check those out! If you have it all set up, then the Collaboration Space is a great place for group work. Unfortunately, although this is 'lockable' during everyday teaching (to avoid random hand-drawn phalluses appearing), you cannot lock individual group spaces like you can on Teams. There is therefore the risk that students could sabotage the work of other groups; however, I have used this several times and this has never happened. I think they just get too distracted with their own page/task to even consider doing this (fingers crossed they don't find this blog and start planning their next guerilla attack...)
To set things up, create a section under the Collaboration Space for the topic/activity/lesson you are working on. For me, I use this a lot for analysing contemporary source material as a group, so I just call mine 'Sources'. I often delete these pages after the lesson, as they are mostly just used for quick activities, rather than anything permanent. Under this new section, you will need to create pages for each of the groups that you want to set up. Tell the students in advance which group they are in and which page they should be working on; it might even be worth writing their name in the page title. If you are analysing images, or an imported printout, I strongly recommend 'setting the picture as background'. This essentially means that only you can adjust the image, so it removes the danger of the file/image being deleted by a gormless Year 7 student. The students can then work together to complete the task or annotate the file. This makes for a great starter activity. I often give each groups a different source to look at and then I cycle through these when sharing my screen, so that everyone can see the work people have put in and we can have a wider discussion about the various sources.

I really hope you found this useful in bringing some aspect of normality back into your teaching life. There are no doubt plenty of other ways that you can facilitate group work in Teams and OneNote. Let me know if you come up with any useful tools - just comment below!
In my next post, I will talk more about collaboration - how can Teams/OneNote support whole-class working?


Comments